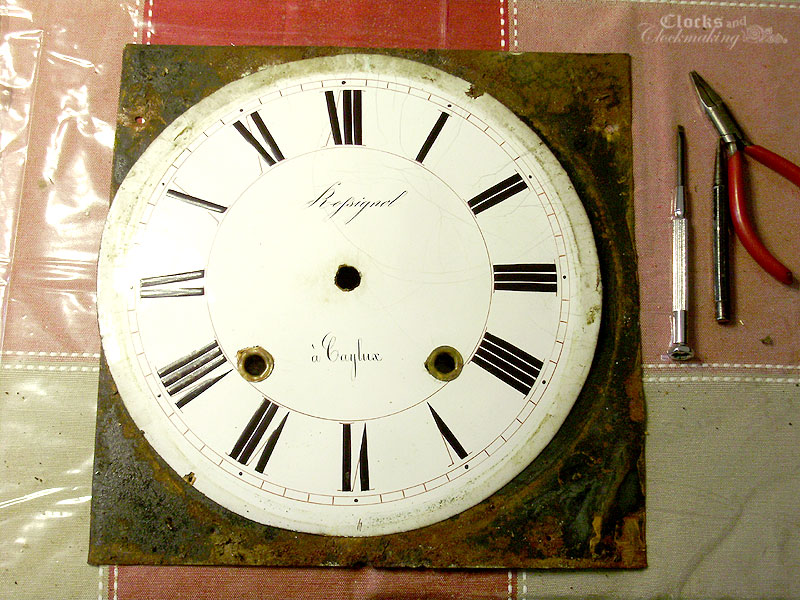
Monday, August 31, 2015

Rossignol à Caylux Comtoise - Repairs

This is a long overdue post, as this clock has been finished, and running for over a month now. It seems as though almost all of these comtoise clocks require repairs. This is the third one I buy, and all three needed repairs (some more severe than others). However, all three are now fixed and in great working order.

Repairing the Dial

I did *NOT* want to take this dial apart, because it still had the original rivets in place, but the enamel portion was loose, and there was quite a bit of rust, so I had no choice if I wanted to do a really proper repair. The two bottom tabs were also broken and I wanted to fix them.

Trying to pop the rivets out was too difficult and very risky (the enamel dials on these are EXTREMELY fragile), so I ground off the backs with a Dremel.


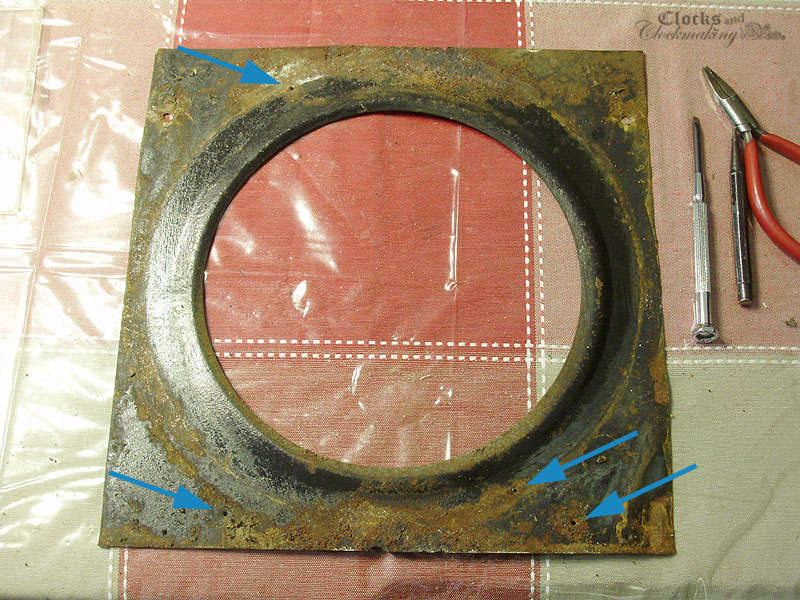
Now, what's extremely bizarre here, is that the enamel dial is completely loose in here. No rivets holding it in place, and no later screws. Note the position of the holes (1 and 7):


The original dial holes in the sheet metal backing plate are at 11 and 5! The arrow shows the 5 o'clock dial rivet, and the lower right brass facing rivet.


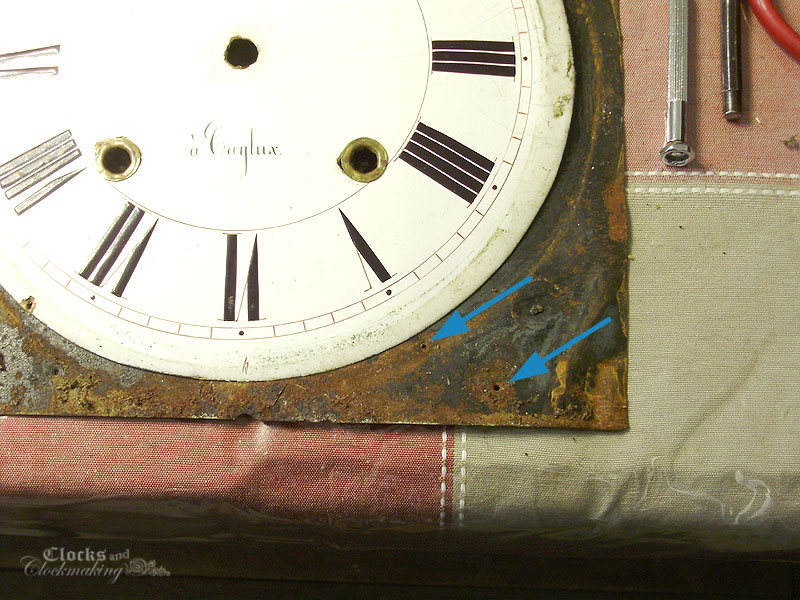
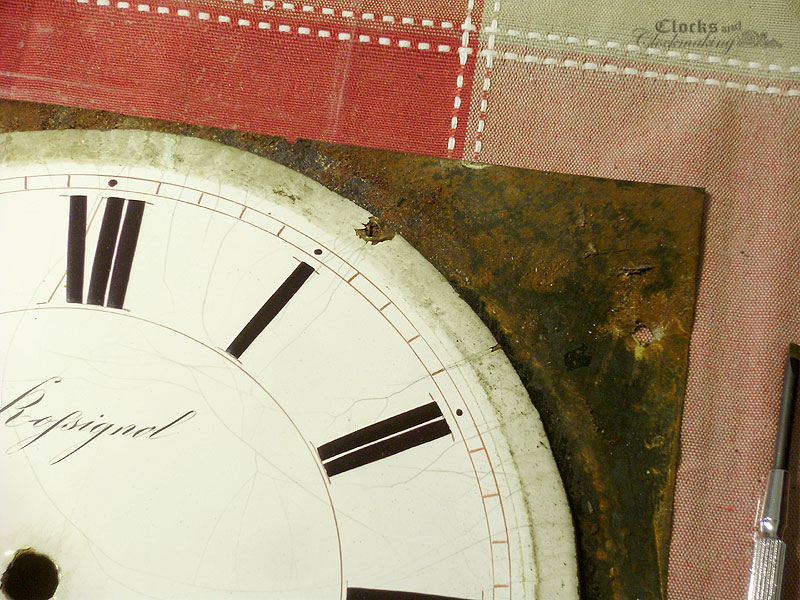
There are no holes at 1 and 7, so this dial can't be the original.


I already knew that this entire dial assembly was not original to the movement (there are 2 sets of holes in the front pillars) so one possibility is that the enamel dial is original with the movement, but the brass front and backing plate are off another clock. The reason I think that the enamel dial may be original is that so far ALL three of my comtoise clocks have different hole spacings and locations with respect to the centre. It would have been very difficult to find an exact match, since a lot of these movements were all hand made. I think the original brass front might have been crushed very badly, and this was the best repair option. It's hard to say for sure.

In either case, I decided that since the clock was unlikely to ever have a more suitable replacement as this current setup, I'd make the marriage as seamless as possible (while also not erasing all traces of it). I very carefully fitted the dial to the backing plate (with small screws), and with some careful fitting of the brass front, it looks great.

Misc Repairs

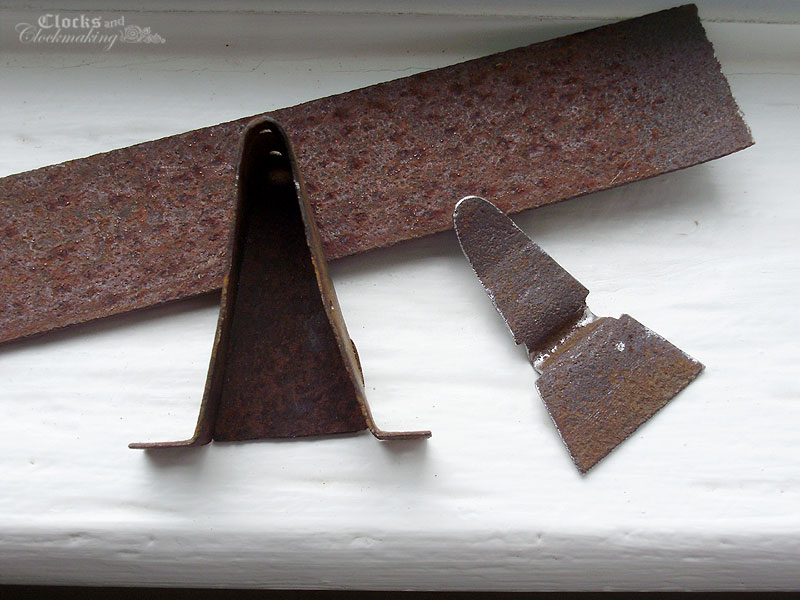
One other piece of the clock that needed attention was the pendulum's silk thread support box. This little hat shaped box is fixed onto the top of the clock, and it was missing the front cover. Luckily I know what it should look like, since it's made the same as on the Radet père comtoise.

The cover was cut from some old rusty steel strapping material, shaped (using a vise and an old nail as a forming tool).


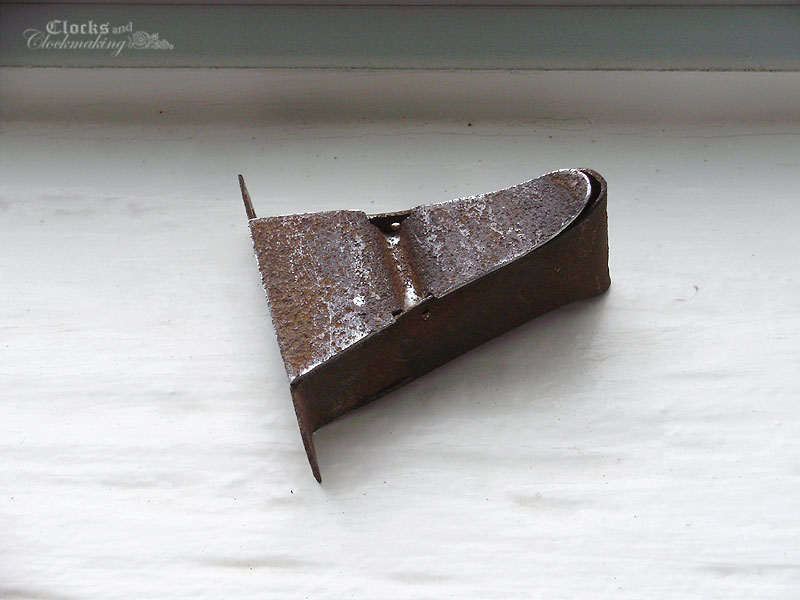
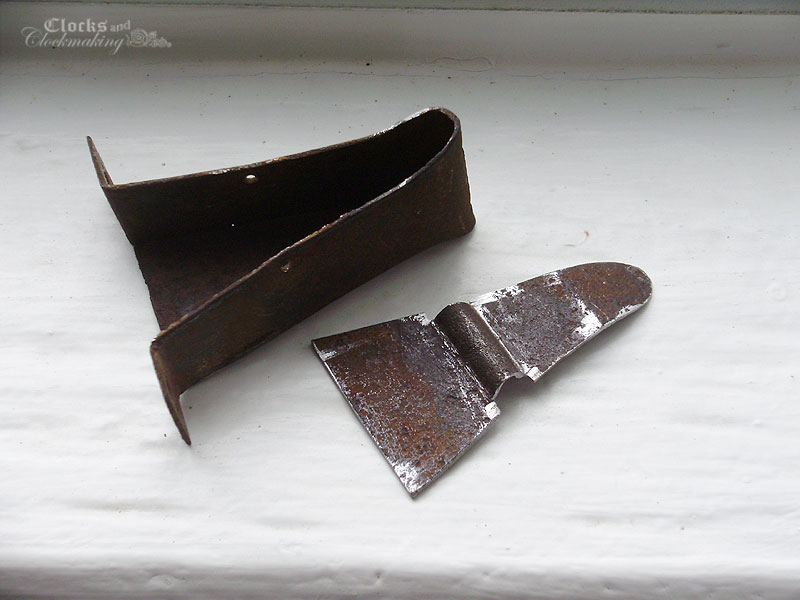
Once it's painted it will match everything else perfectly.

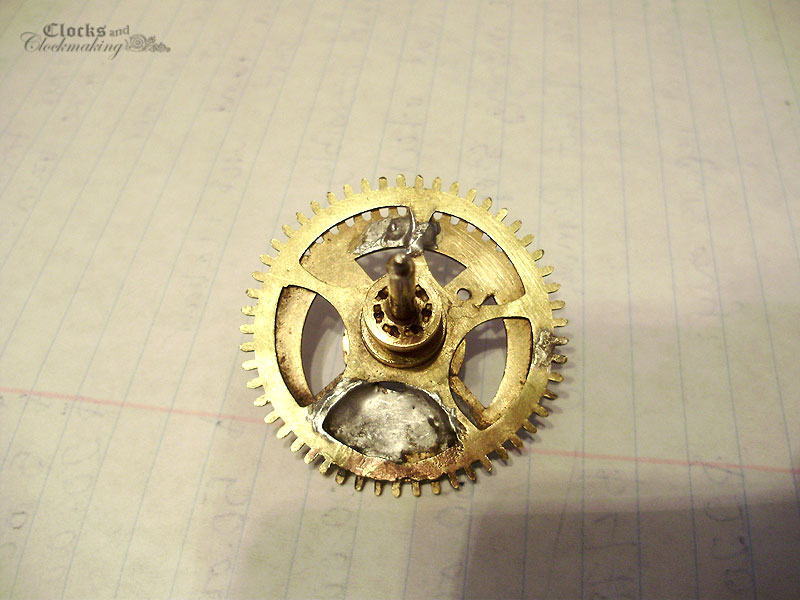
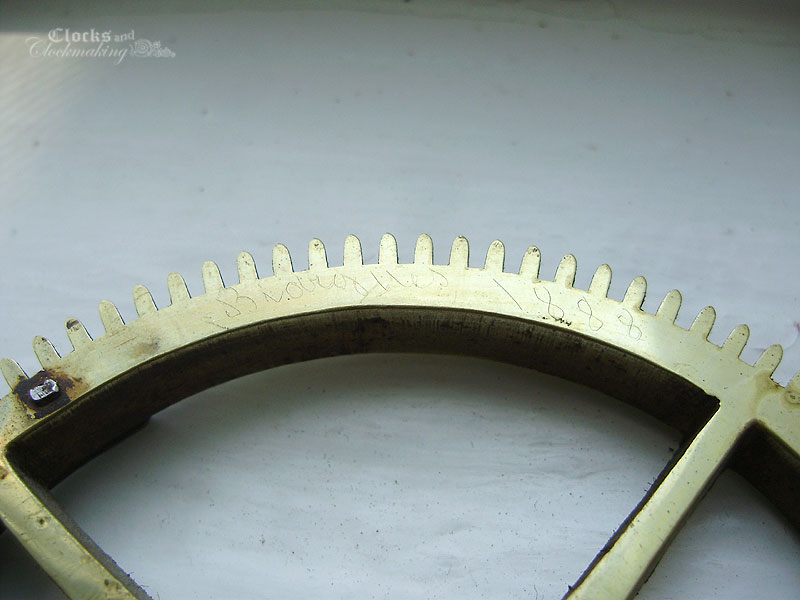
While I was cleaning the wheels, I found two old inscriptions. One appears to read "Biorgues 1888":


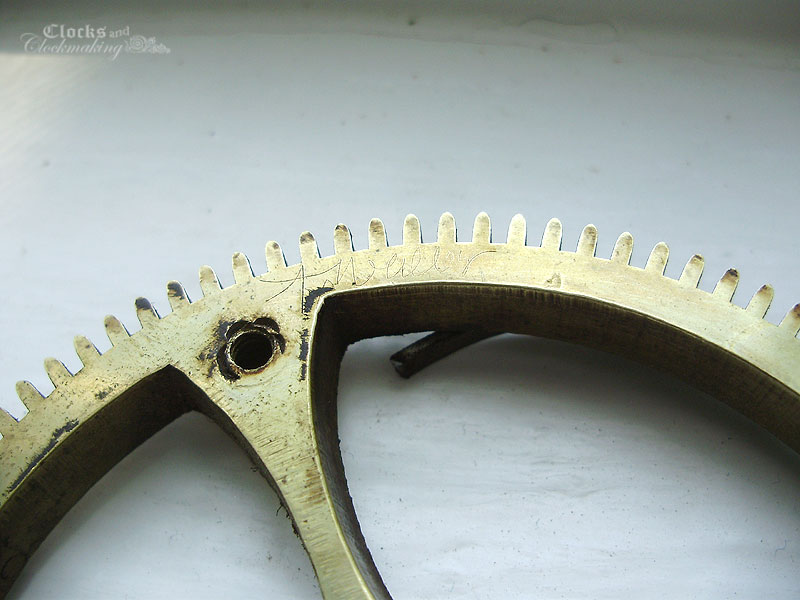
While the other appears to read "A Wallez":


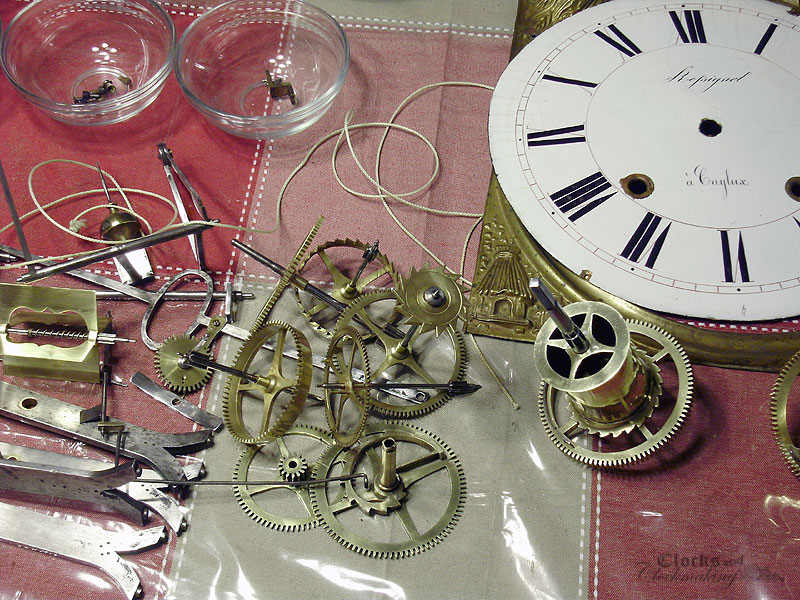
A few photos showing the cleaned-up wheels and levers:


A few other repairs included patching the large hole in the top (using JB Weld), and small odds and ends such as cutting new leather washers for the bell. I did not find an affordable set of replacement doors yet (I'm not spending 100$ on them) so I made a temporary one from thin Masonite painted black.

The last thing I need to do now is photograph my "make do" replacement pendulum, and photograph the completed clock. I will also need a proper set of weights, and new lines/hooks, etc.

Gilbert Pandia Clock Repair

Today I wanted to share some details on a recent repair project I worked on for a client. This is a rather nice Gilbert Pandia clock, made in solid walnut in 1885 (see catalogue illustration below). The clock is interesting for a few reasons. 1: it uses very unusual side turnings, which I have not seen on any other parlor clocks or gingerbread clocks in this style, and 2: it features FOUR different patents on it.

This model also appears to be somewhat rare, because I was only able to find 2 or 3 other examples of them. This is especially sad for me because the case on this clock has nearly 90% of the top missing, while everything else is still in very good shape.


The clock arrived to me looking pretty rough, and my list of repairs included the following:

- Complete clean/oil/adjust
- At least 6 bushings
- Re-leather hammer (the current tip looked like a rubber eraser)
- Replace missing pillar nut
- Replace missing broken hand on the pendulum
- Repair/rebuild broken fan fly assembly
- Replace badly damaged/patched strike wheel
- Replace/rebuild missing strike train stopwork
- Remove silver paint from dial centre
- Rebuild entire missing top, including custom carving, dentil moulding, special profiles, and turnings, strip and refinish case (case is currently painted copper, and this is visible around the dial opening)


The gong patent date is not clearly legible. Note the eraser hammer tip.


The patent fly design (one half is missing). You can also see the repaired wheel to the left, and a copper wire tie (upper right) that had been used to disable the strike train.


A soldered bushing repair on the back (this was removed, and the solder was scraped down as much as possible).


Missing nut and fly patent date:


1879 strike patent date, missing stopwork on left:


Because some of the repairs were going to be quite expensive, the owner decided go ahead with only the necessary repairs to return the clock to good working order. This included the cleaning, bushings, leather hammer repair, and the wheel replacement. The rest (for now at least) will remain as-is.

That said, I understand not wanting to spend an absolute fortune on this particular clock. The owner particularly liked the tone of the cathedral gong, and wanted to have the clock working again.

Here is the Gilbert Catalogue illustration for the Pandia model:


And here is a web image of a restored Pandia clock by Gary Jacobson (https://www.flickr.com/photos/jacobsongary/albums/72157623409503717). This gives you an idea of how complicated the missing woodwork is:


Here are the relevant patent drawings (Google Patents). The first shows the fly, patented Feb 26th 1884.


Strike lever improvement June 3rd 1879. This includes a clutch that allows the hands to be rotated backwards.


The gong patent is apparently for better resonance and sound, patented April 18th 1882.


And lastly the two patent pages showing the details of the pendulum. The pendulum is actually a sealed assembly, which makes any kind of repairs incredibly difficult. The pointer hand indicates how far up or down you have been adjusting the clock, and it moves smoothly as you operate the bottom rating nut (which stays in a fixed position). Patented Oct 30th 1883.


Most of the repairs to the movement were standard stuff, but this was my first time doing a complete wheel replacement. The old wheel repair was pretty horrific.


Here is the very unusual problem that I encountered with this wheel. While the wheel seemed to operate normally in the movement, the strike would only work for about 1/4 of the wheel, then the count hook would start to hit the count wheel teeth, missing all the deep slots, and ultimately landing on the tooth tips. Eventually the count hook would land back in the notches. No amount of adjustments made any difference, and it took me a while to figure out that there was a problem with the tooth count or the repair on the horrible wheel. When I removed the wheel to look at it more closely, I found that the wheel had 53 teeth, and it should definitely have 52 (tooth counts for wheels are rarely odd numbers). Because of the extra tooth, this made it impossible for the count wheel to advance properly. Originally the client had not wanted to have the wheel repaired (due to costs) but after I explained the problem, he told me to go ahead with the repair.

What is really odd, however, is that the wheel doesn't appear to be ovoid, and even with an impression of original teeth laid in the broken section, the tooth count is still off. The numbers shown in black don't count the two teeth bisected by the centre line.


In any case, the wheel was carefully measured, and the information was sent to my friend Jim in Texas.


This shows the wheel sections carefully taken apart:


Jim was able to provide a replacement wheel and mail it to me:


The wheel was reassembled, installed, and now everything seems to work properly again. The clock is being tested this week, and hopefully I can return it to the client next week.


I shot a short video showing the repaired clock striking correctly.