
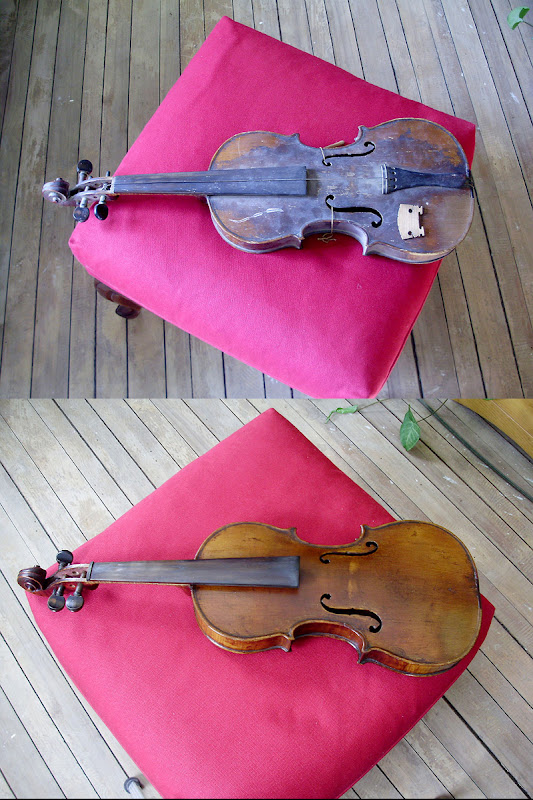
As you can see, the violin went through quite the transformation. Here's another look at some of the "before" photos:

This violin is a friend's family heirloom. Apparently there were a few people in the family who wanted it, but it went to my friend. I don't remember if it was his grandfather's or his great-grandfather's, but in either case, it was in very bad shape, and he wanted to have it repaired so that my other friend (his wife) can play it.
Just from looking at the violin, it's very apparent that it was well loved, and saw a LOT of use. There are actual divots in the ebony fingerboard from playing the instrument. At some point, the nut (the small piece of wood at the top of the fingerboard) was lost, and the strings were simply held in place (poorly) directly on the end of the fingerboard (causing about 7-8 different marks in the wood). At some point the bottom saddle (the black strip along the bottom which spreads out the force from the tailpiece's gut line) was lost, and the instrument was played anyways (which caused two deep wear marks into the cedar top from the stress of the tailpiece gut). The current saddle is ebony, and obviously hand carved by an amateur. This adds charm, so I simply reglued it (it had come loose).
The existing bridge also looks like a later replacement, and the top of it (along with the 4 string grooves) are very poorly cut. The angle of the top of the bridge is also wrong (it should have a bit of a slope). It also doesn't make good contact with the top of the violin (it would need tweaking). The tailpiece also happens to be broken (the upper right corner hole is torn out) and I suspect the tailpiece isn't original either. Two of the pegs might be original, but one is a later replacement, and the fourth one is missing. We may opt to get a whole new set.


The entire neck was split (weakened glue joints) on the top and bottom, and there were one or two other places along the top that were separated.
Lots of scratches and abrasions on the back.

I didn't know exactly how far my friend wanted me to go with this violin, but I had told him I'd do my best, while also trying to do as little as possible to change the antique qualities/patina/look of the violin.
The top, however, was pretty far gone. My friend said that he doesn't think it ever had a chin rest, and I believe him. If you look at the second photo above, the chin rest portion of the violin top is down to bare wood, and it has darkened from oils/grime. What was left of the finish on the top was just a few sections near the edges.
To clean the old finish on the top, all I did was lightly rub the surface with a clean cloth dipped in alcohol. The fingerboard was removed before cleaning the top (it was already loose). The original finish was shellac, and the alcohol melted and redistributed the shellac. A lot of the shellac that was there, however, had turned black from oils, and grime, so about 80% of it was removed. While rubbing off the shellac, I was also trying to blend the finish, and keep the darkened edges intact. I could have taken it down almost to bare wood, but then the surface would not have matched the sides or the back, and I did not want to strip the original finish and patina off the rest of the violin. The sides and back were relatively okay.
The rest of the violin was cleaned with a damp cloth and thoroughly washed. You can see from the photos of the scroll that a lot of what was there was just dirt.
All the loose joints were glued with hot hide glue, and clamped with instrument maker's clamps (or shop-made equivalents). Once the violin was clean, I went over it to remove any excess blobs of glue, or other imperfections. I did some small touch-ups, and then I applied 1 or 2 thin coats of fresh shellac over the violin, avoiding the neck area, and applying additional shellac to the mostly-bare front. This thin new coat helps to conceal the scratches, as well as bring back a lot of the shine to the instrument (especially along the sides, and in the details of the scroll). The shellac (once dried overnight) was then hand polished with ultra fine steel wool and wax, and buffed with a cotton cloth.
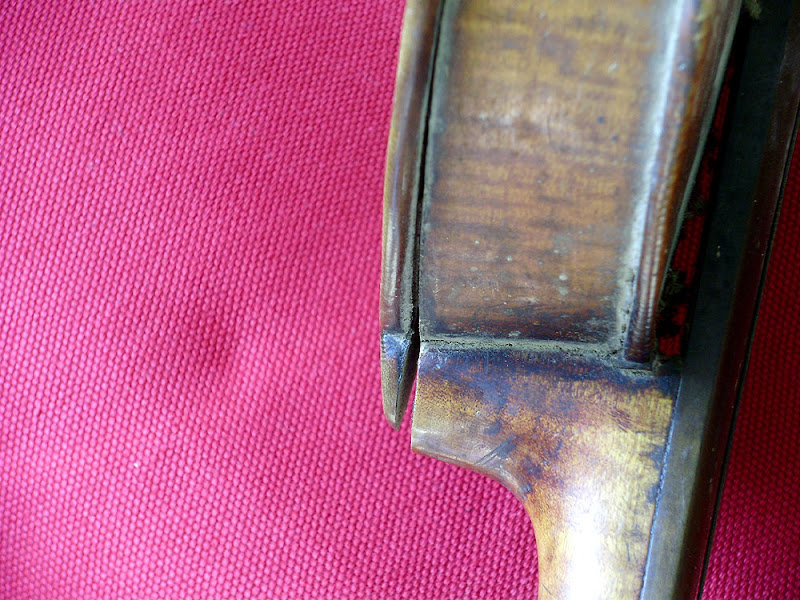
The final little bits to repair were to reattach the fingerboard, and to fabricate and glue a new nut. The violin is now done, and all it needs is to replace the missing bits, and to set it up. Luckily the violin still has the original sound post, since these can be hard to fit precisely (without being able to remove the top). I don't know how to set up the sound post precisely, but hopefully we can find someone in town who can do this for us (as I have my own violin project that will need the same treatment). Luckily we do have a fairly good music shop.

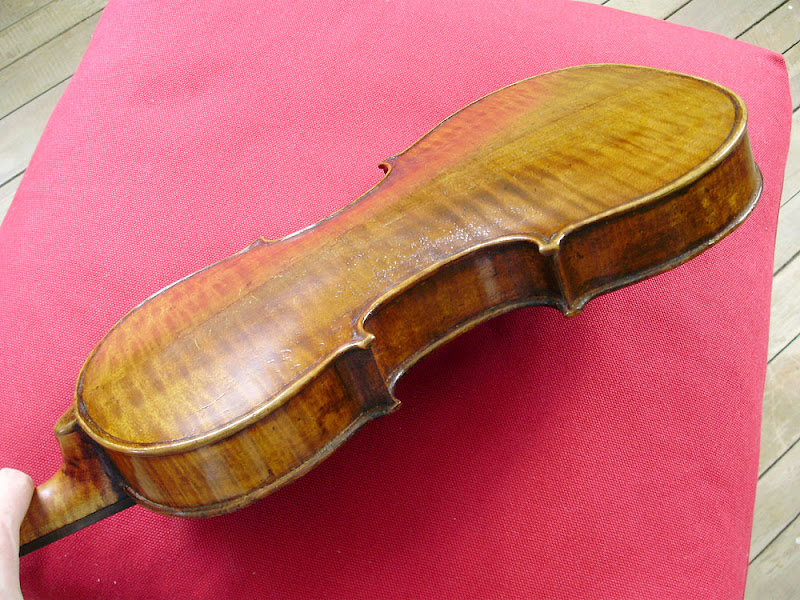
I am very happy with the final results. The violin still looks old, still has a lot of its original character, and almost all of its surface patina. The surfaces are far from perfect, but with a fresh finish, it is now safe for handling and playing.


It's hard to believe that this beautiful reddish dye was hiding under all that dirt and grime.

I don't know exactly how old this violin is, if it sounds good, or if it's at all valuable. It doesn't have any label or markings of any kind on the interior. There are at least one or two small breaks (near the left F hole) and along one side which may or may not minimally affect the sound, but I'm very excited to hear it once it's ready. I'll see if I can find any more info on it for anyone who might be interested. In any case, all the restorations I did to the violin are completely reversible (hide glue/shellac).
No comments:
Post a Comment